How to Set Up RAG
Note: The resources shown in these screenshots have already been deleted. You’ll need to create your own for this to work.
The following document shows how to setup RAG in Chime V5. RAG allows you to chat with your Chime V5 knowledge base articles and files (PDF, Word documents, PowerPoints, and so on.)
There are 11 steps:
Create Azure Storage Account
Create a Storage Container
Create Azure AI Search Service
Create Azure OpenAI
Open Azure AI Foundry Portal
Deploy gpt-4o Model
Deploy Text Embedding Model
Connect gpt-4o Model to Storage and Search Service
Connect Azure OpenAI to Chime V5
Connect Azure Storage to Chime V5
Connect Azure AI Search Service to Chime V5
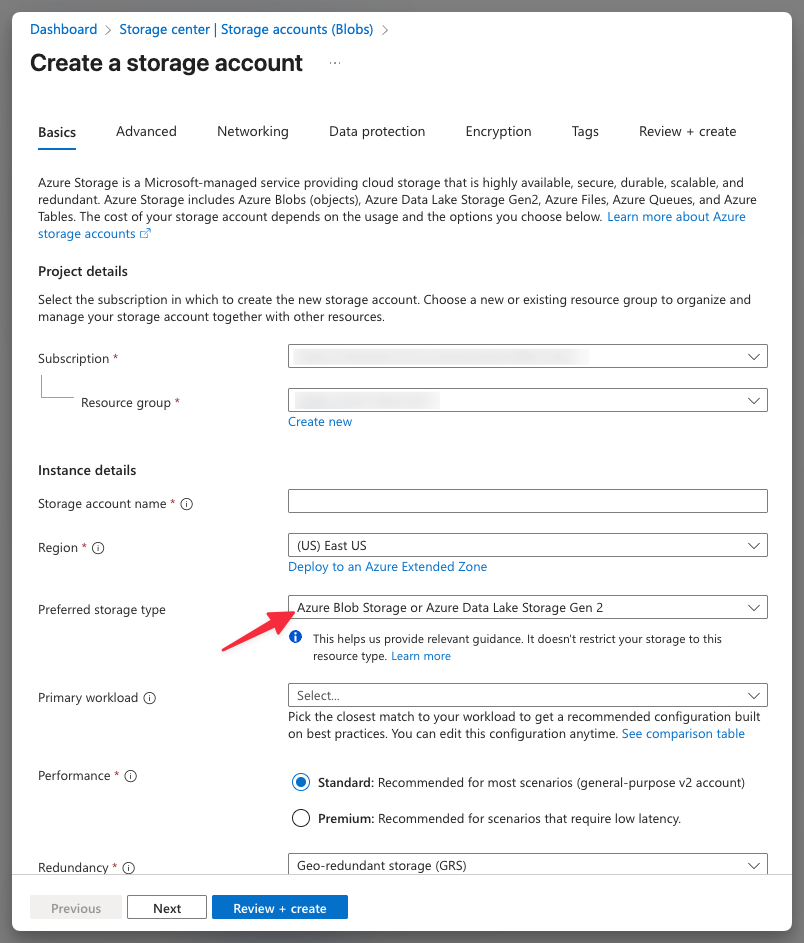
Step 1: Create Azure Storage Account
Please go to Azure and create a Storage Account. You can do this directly from here: https://portal.azure.com/#create/Microsoft.StorageAccount
Note: Please select Blob Storage (highlighted by the red arrow on screenshot below).
Step 2: Create a Storage Container
Once you create Storage Account, please open the resource, and click the Containers menu. Then:
Click Add containers
Enter container name (you will need this later)
Click create
After you create a container, it should appears on the container list.

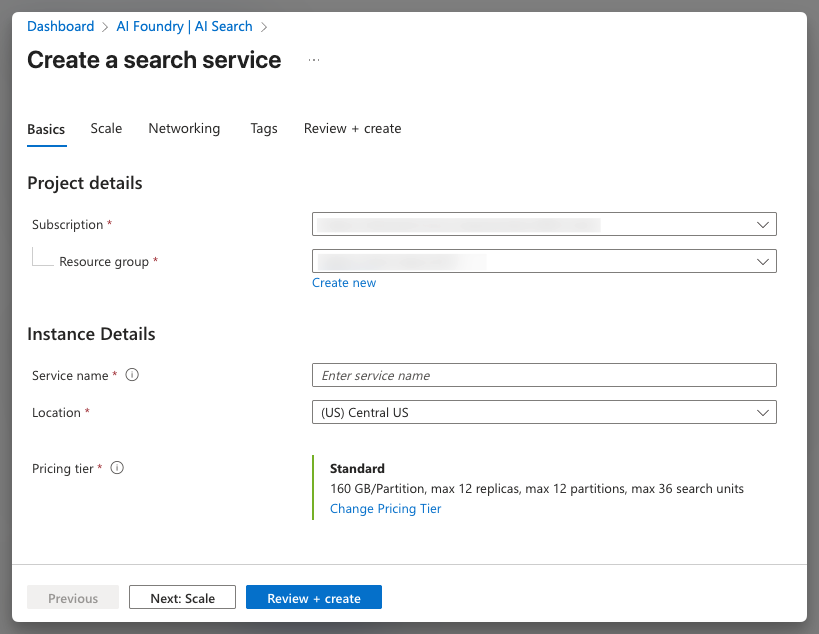
Step 3: Create Azure AI Search Service
Open this URL to create: https://portal.azure.com/#view/Microsoft_Azure_Search/Create.ReactView
Note: Please select paid pricing otherwise it would not work.
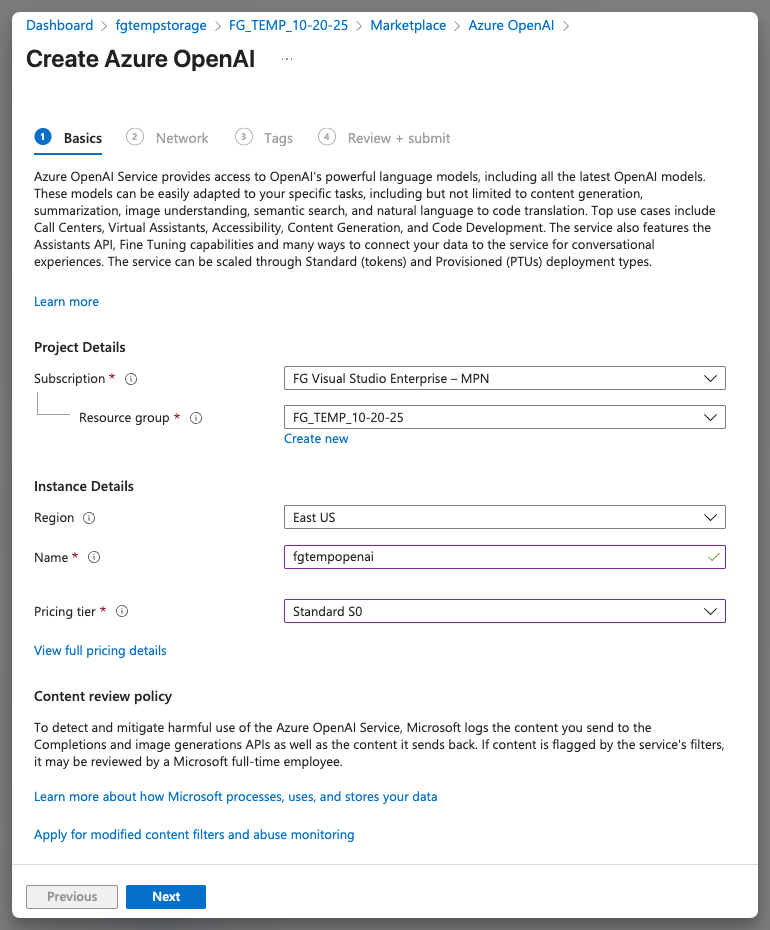
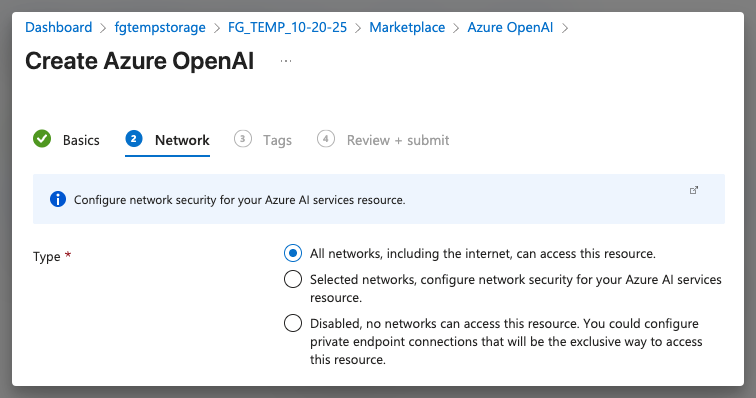
Step 4: Create Azure OpenAI
Open this URL to create: https://portal.azure.com/#view/Microsoft_Azure_ProjectOxford/OpenAICreate_Dx
Please select All networks.
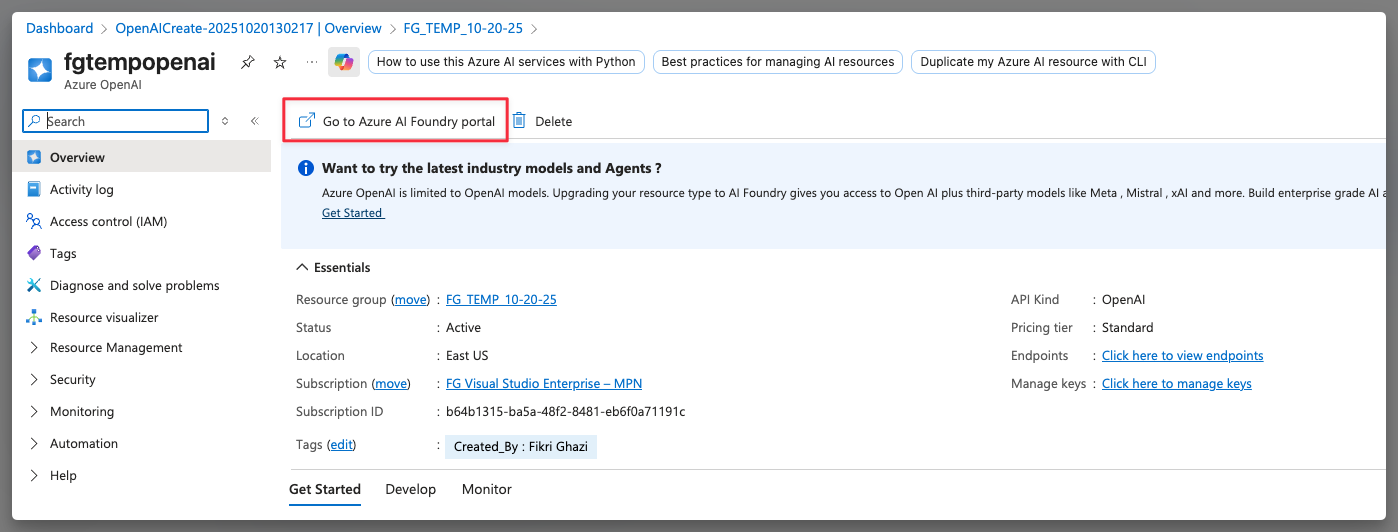
Step 5: Open Azure AI Foundry Portal
Open your Open AI resource, then click “Go to Azure AI Foundry Portal” highlighted in red below.
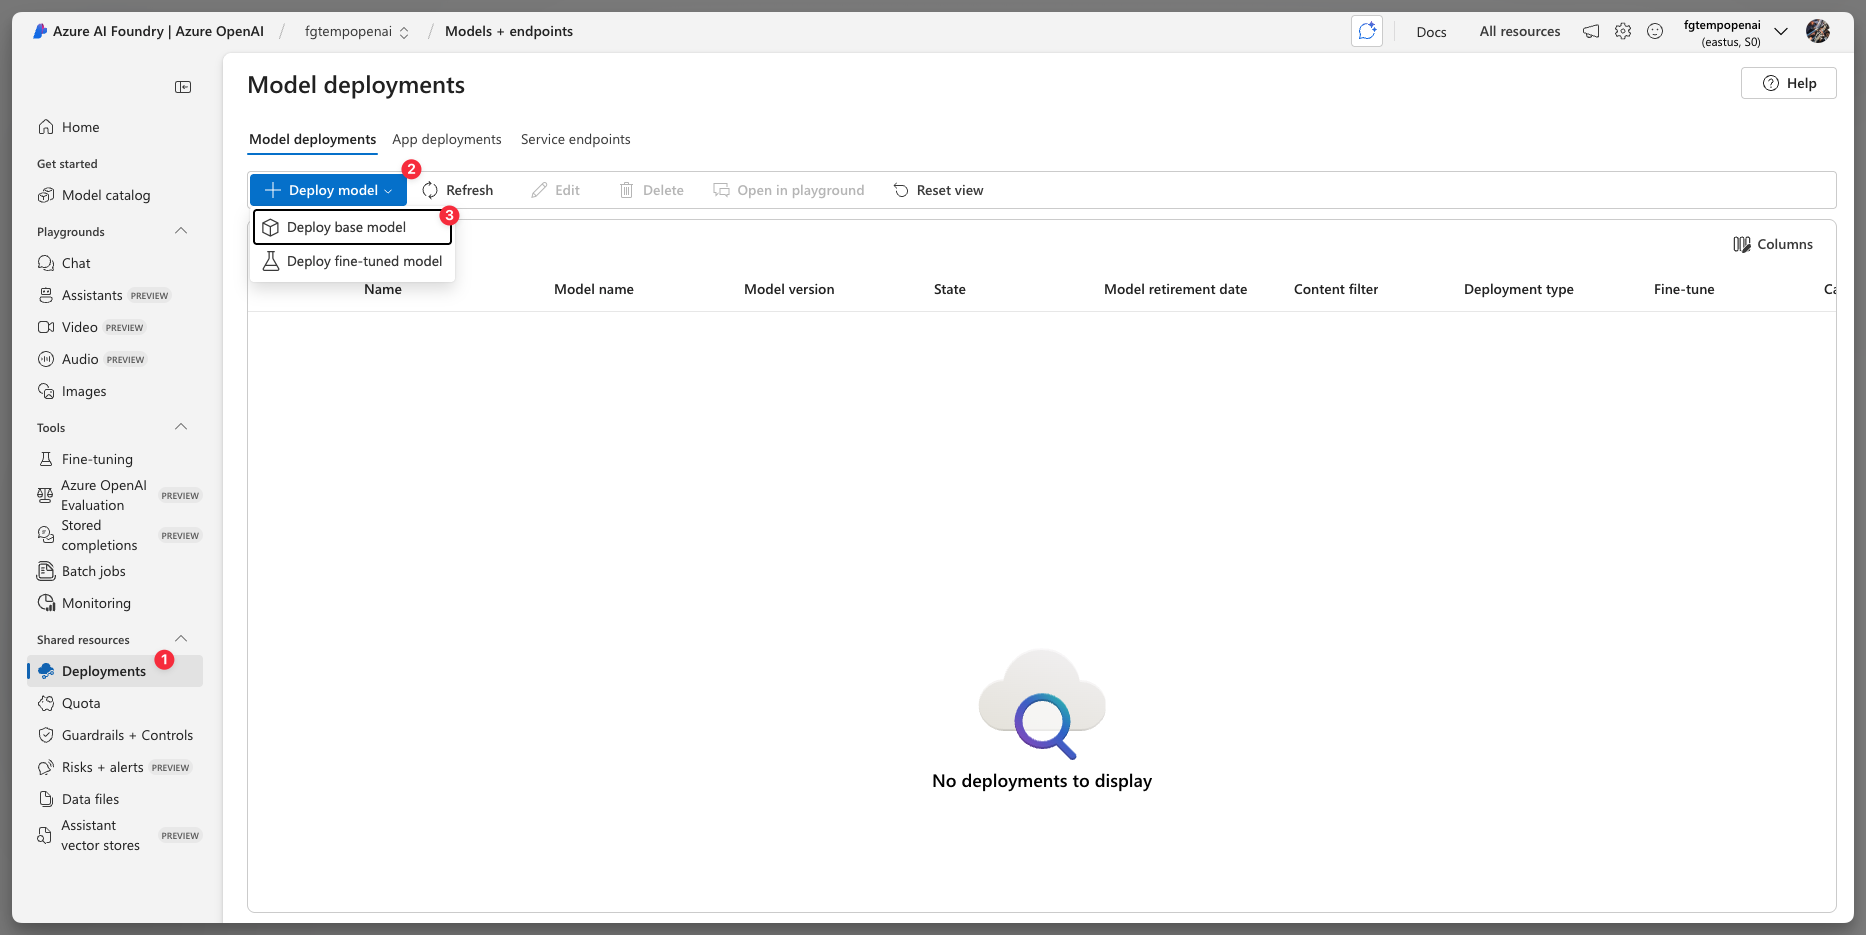
Step 6: Deploy gpt-4o Model
One in the portal, then click Deployments > Deploy model > Deploy base model.
Find gpt-4o, then click confirm.
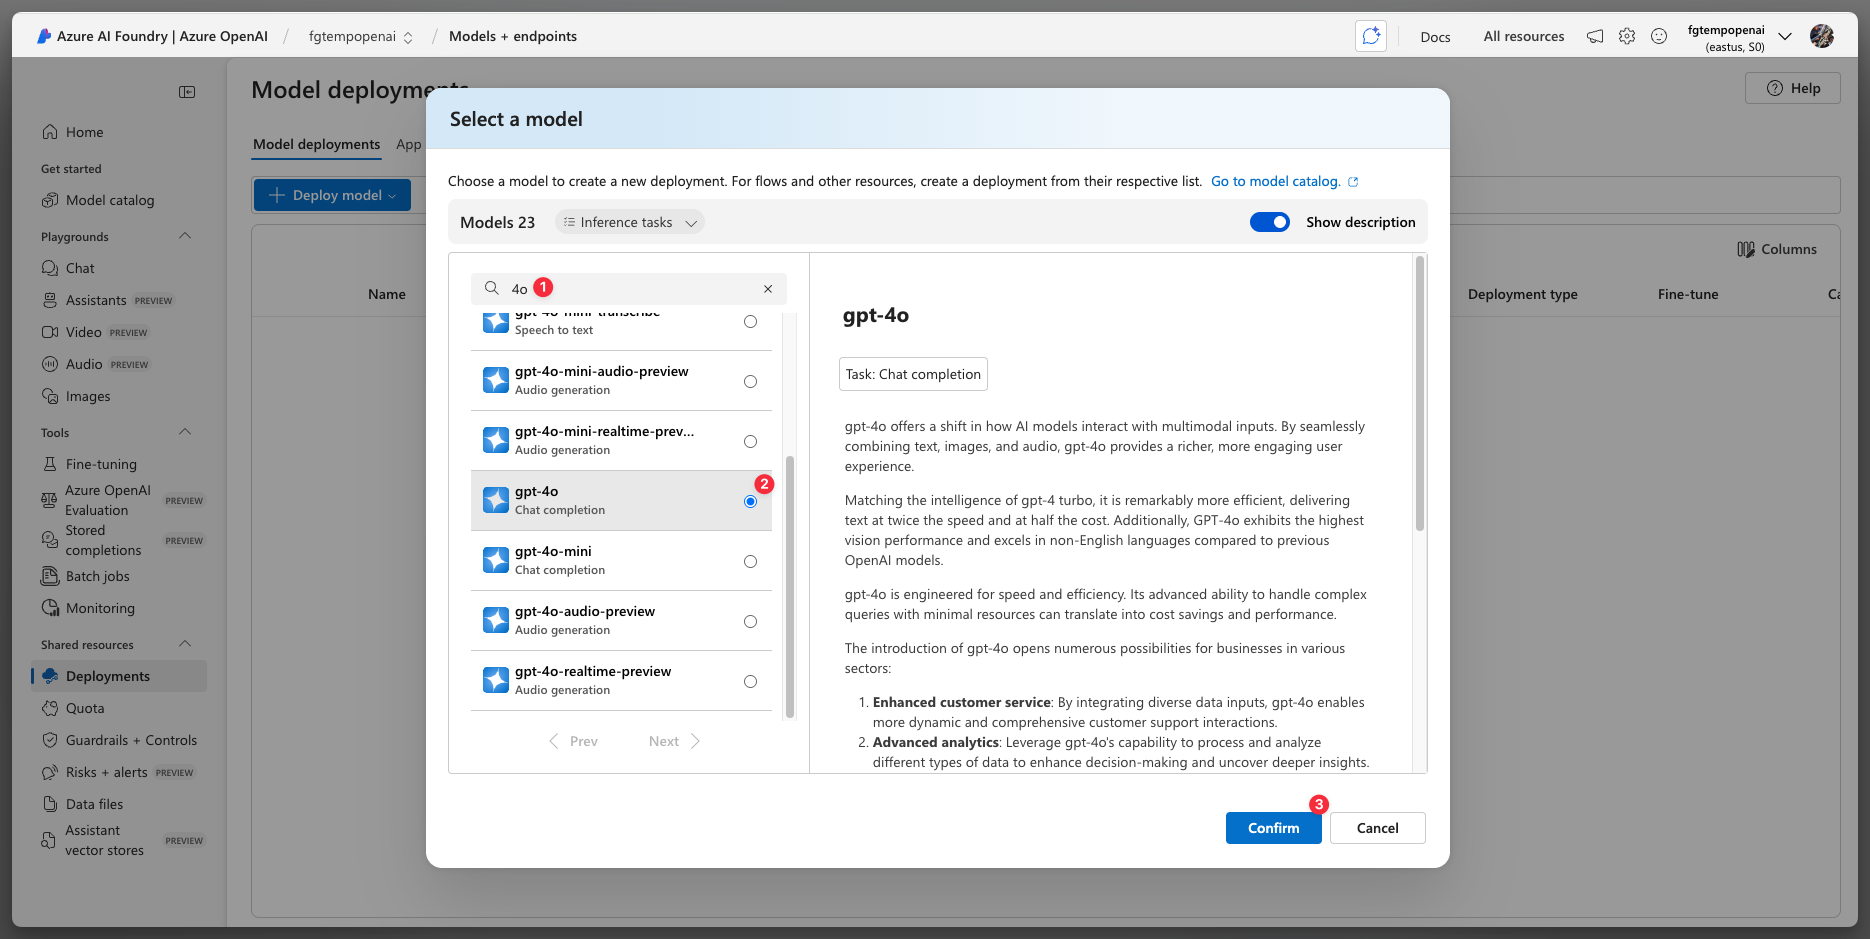
IMPORTANT: Make sure your token is at least 100k for production.
For demo purpose 50k is fine.

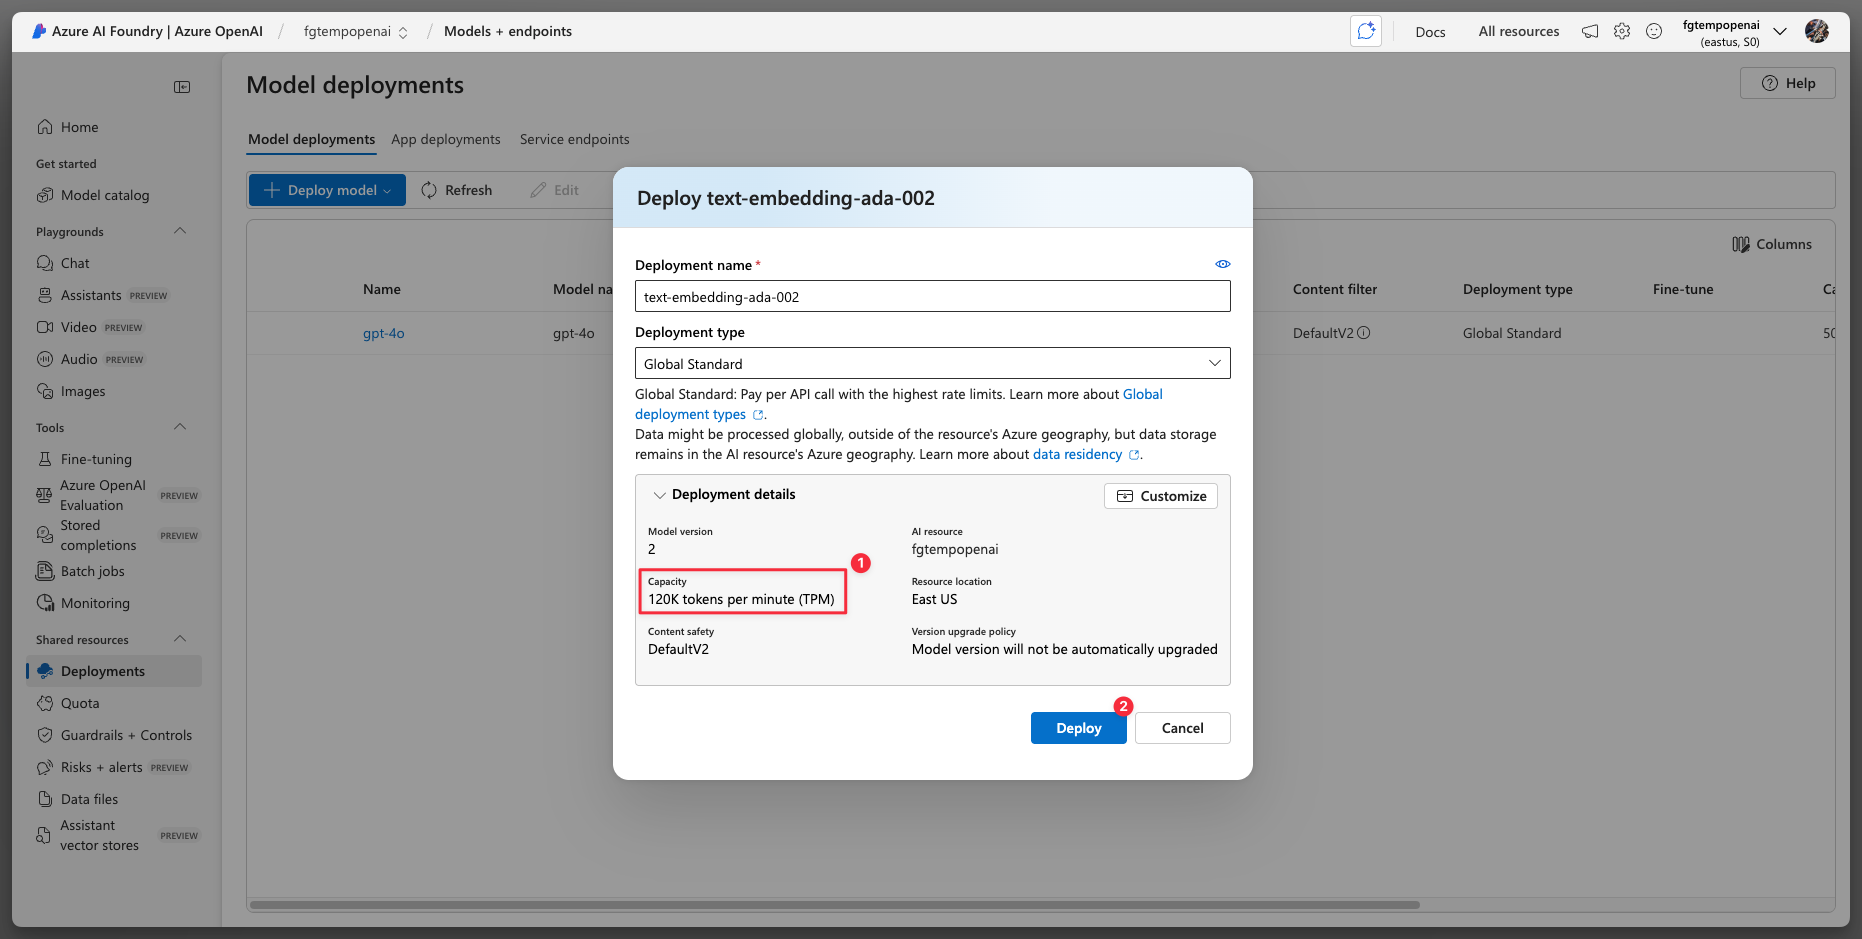
Step 7: Deploy Text Embedding Model
Click Deploy model again. This time find “text-embedding-ada-002” instead of gpt-4o. Then confirm.

Make sure you have at least 100k tokens for production. Then click the deploy button.
Step 8: Connect gpt-4o Model to Storage and Search Service
After you made 2 base model deployments (gpt-4o and text-embedding-ada-002) do the following
Click the Chat menu on the sidebar
Make sure your gpt-4o selected
Click “Add your data” dropdown
Click “Add a data source”

Select the Azure Storage and container you created in previous steps.
IMPORTANT: Make sure you select your embedding model (text-embedding-ada-002).

Leave default settings like screenshot below for Data management.

IMPORTANT: Please select API key on the Data connection. Click Next and submit and you should see the next screenshot.
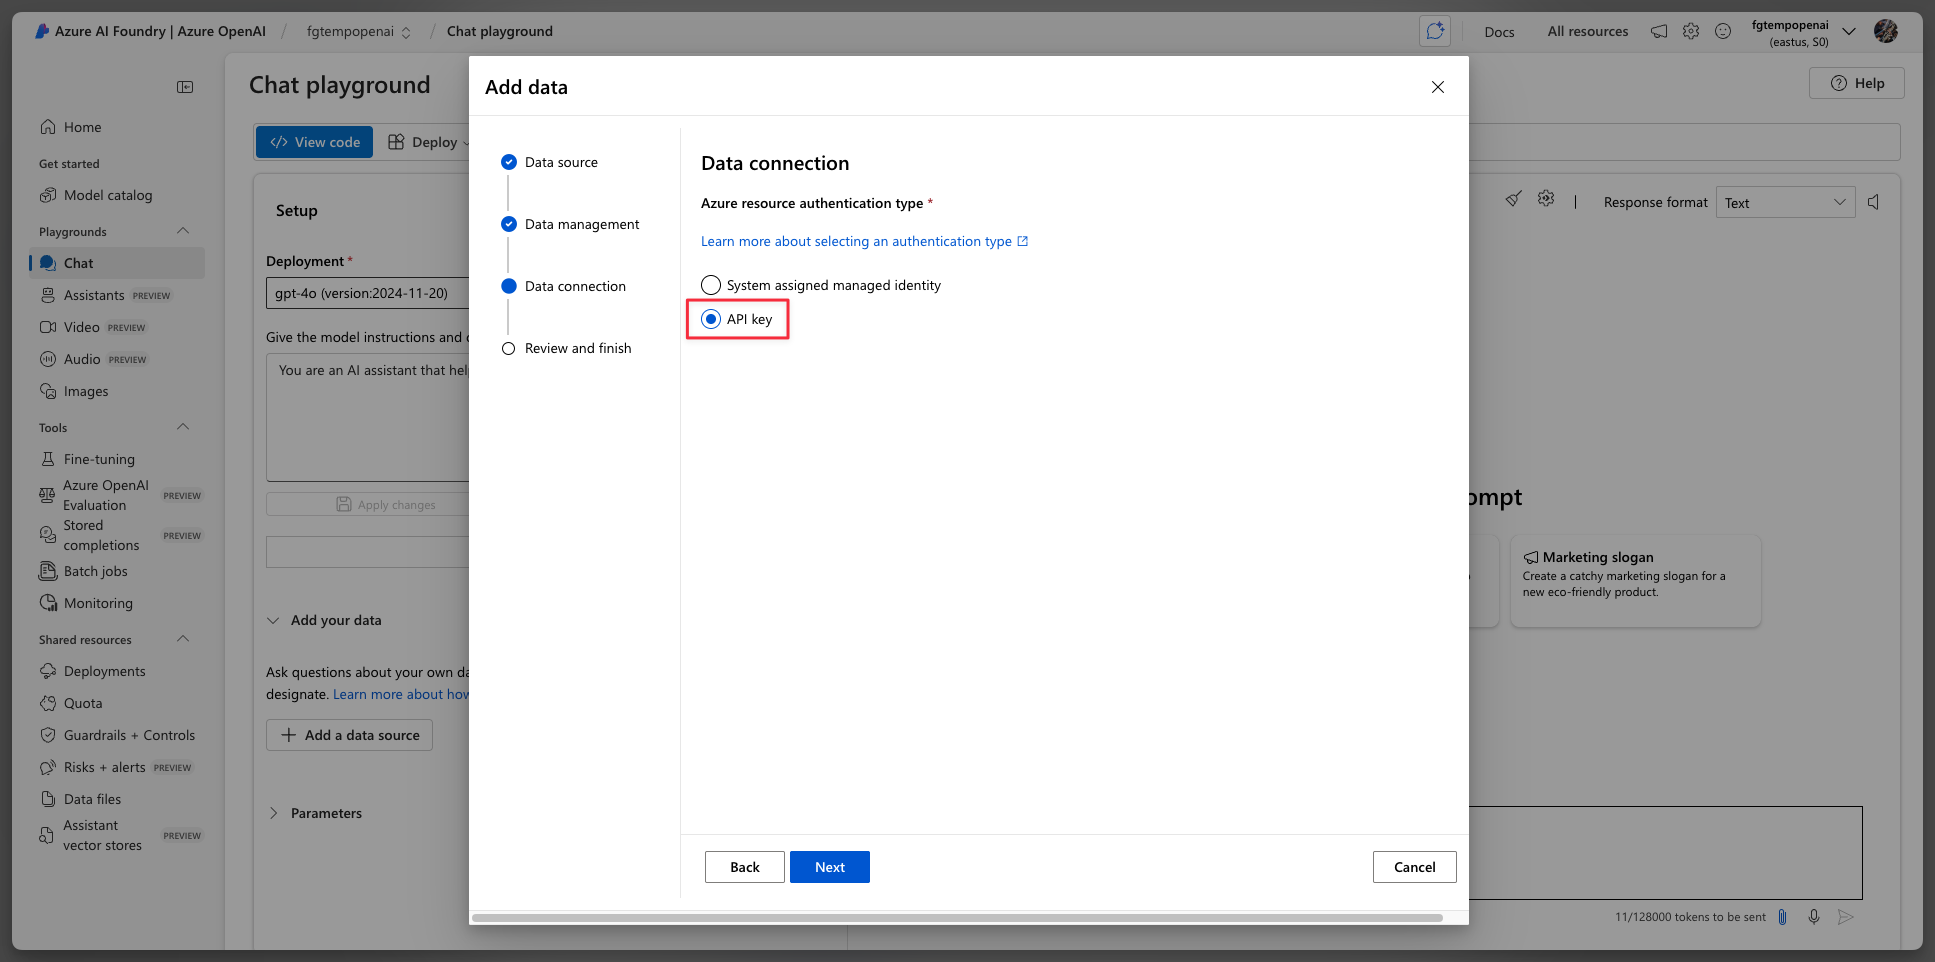
NOTE: That warning message is normal.

Step 9: Connect Azure OpenAI to Chime V5
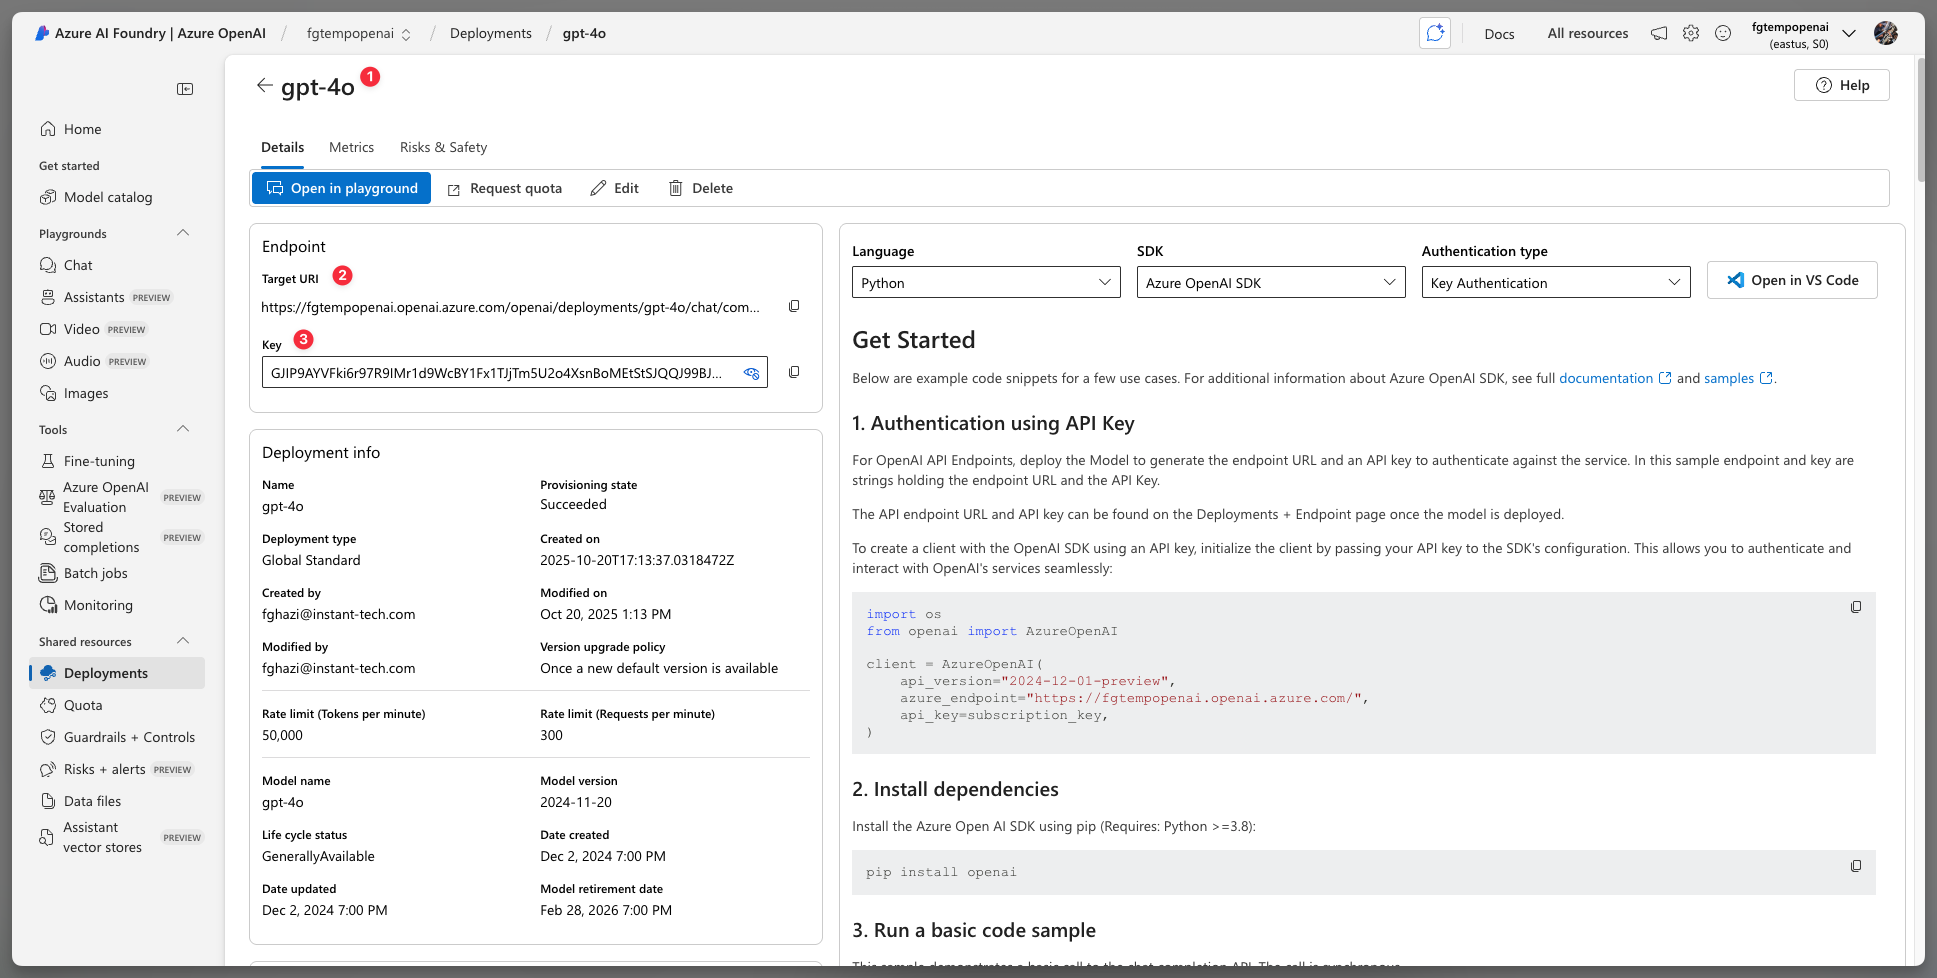
From your Chime V5 admin, click Chime settings dropdown, then click Azure OpenAI Services. Disable the “Use Default Settings”. Then fill out the 3 input fields which you can copy and paste from the Azure AI Foundry Portal.

Grab the “Model Deployment Name”, the endpoint, and key from here:
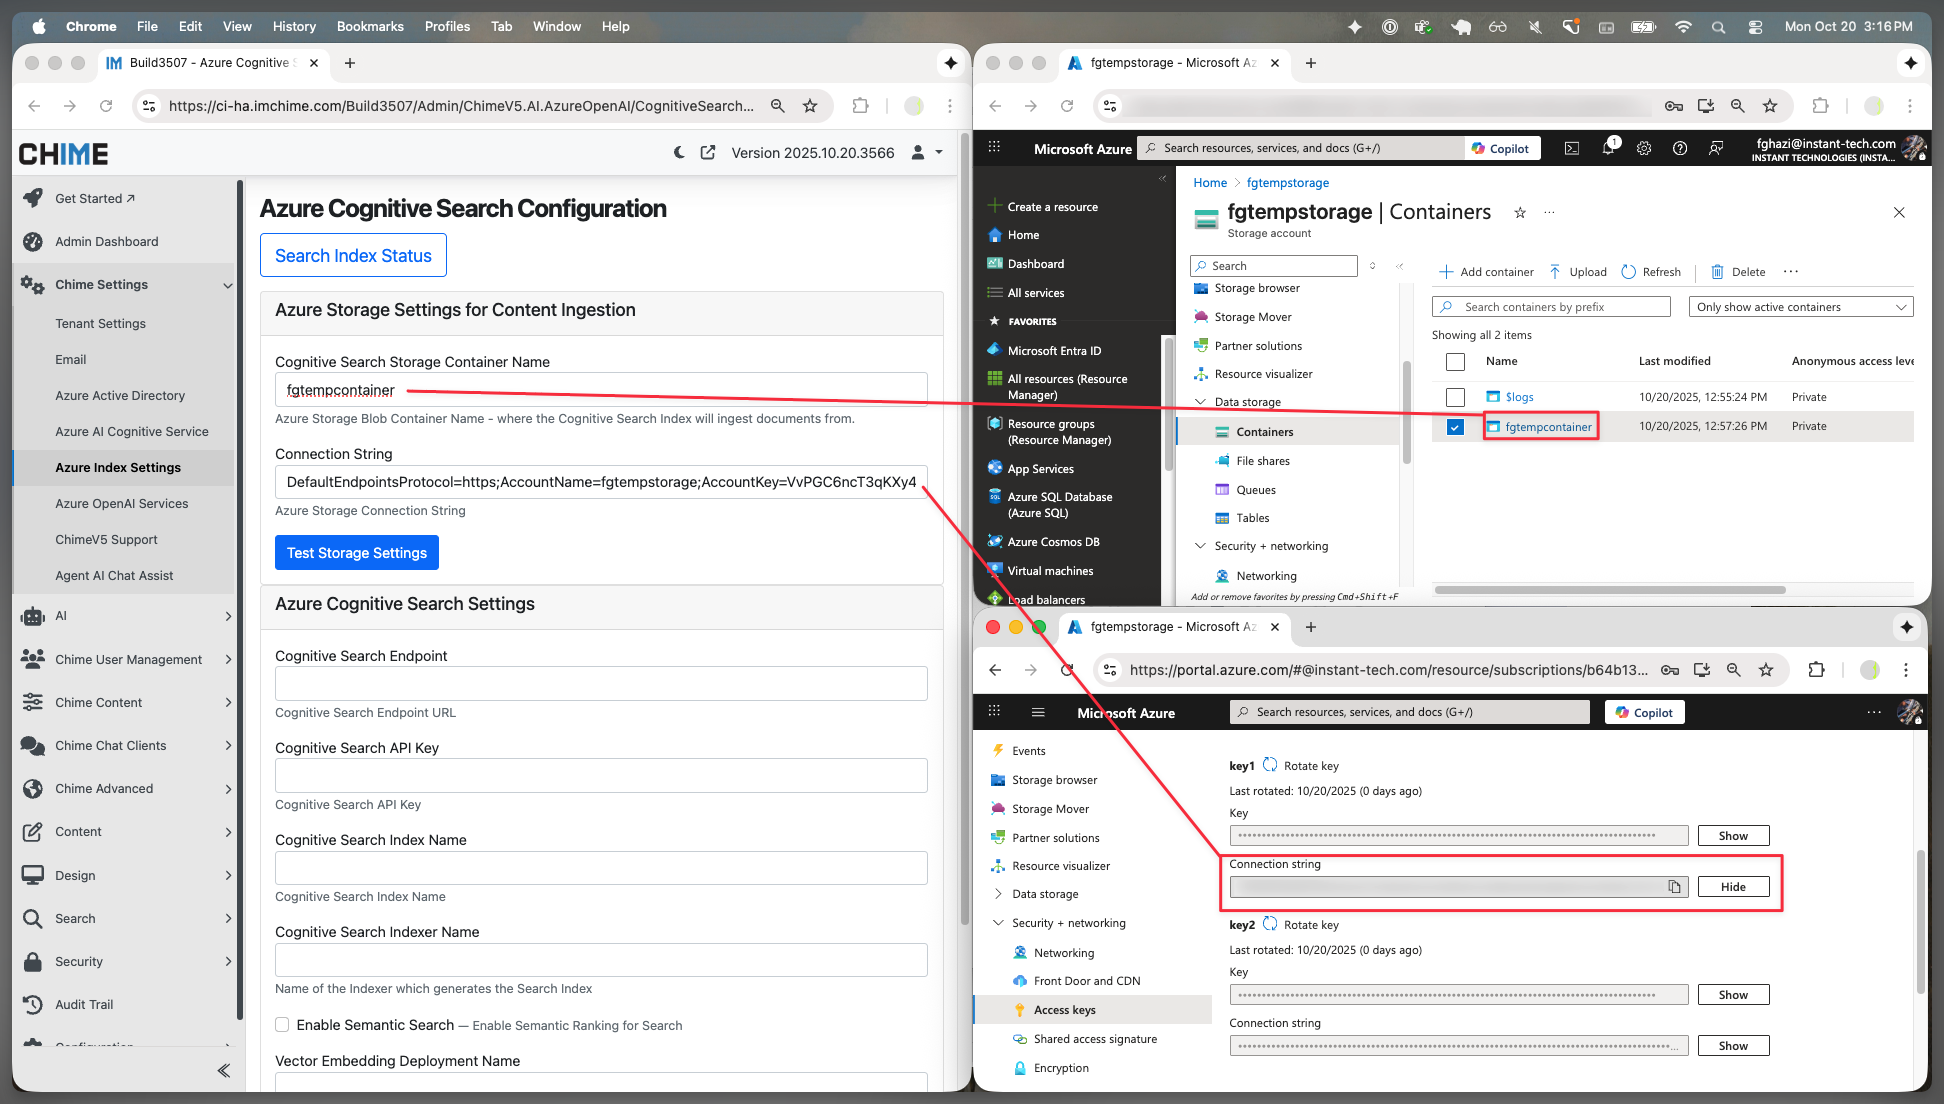
Step 10: Connect Azure Storage to Chime V5
Open Chime V5 admin, click Chime settings on the sidebar and click Azure Index Settings.

You can get container name and connection string from your Azure Storage Account resource you created from previous steps.
Step 11: Connect Azure AI Search Service to Chime V5
Still in the same page, fill out Chime V5 Azure Cognitive Search Settings. Click Test Index Settings and finally click Save. To get the data for each input field, see remaining screenshots

Cognitive Search Endpoint:

Cognitive Search API:
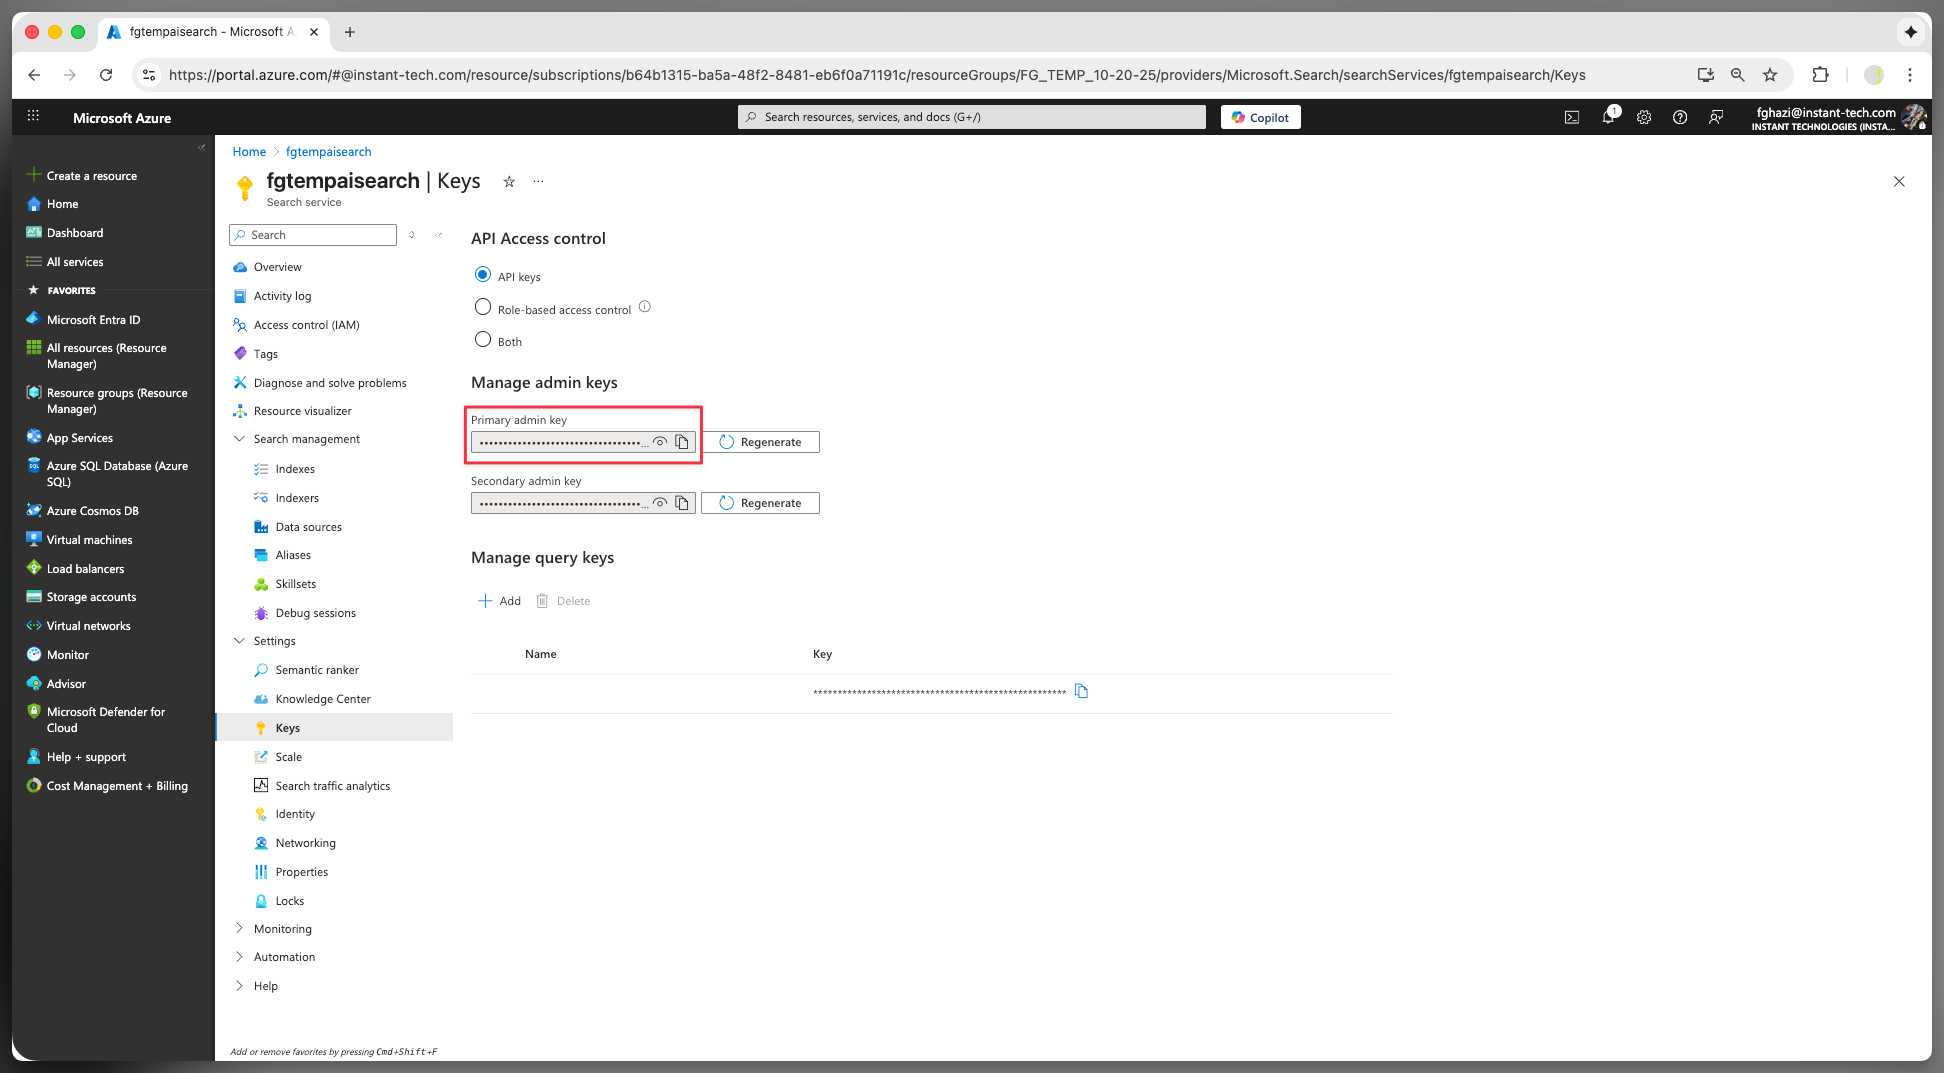
Cognitive Search Index Name:

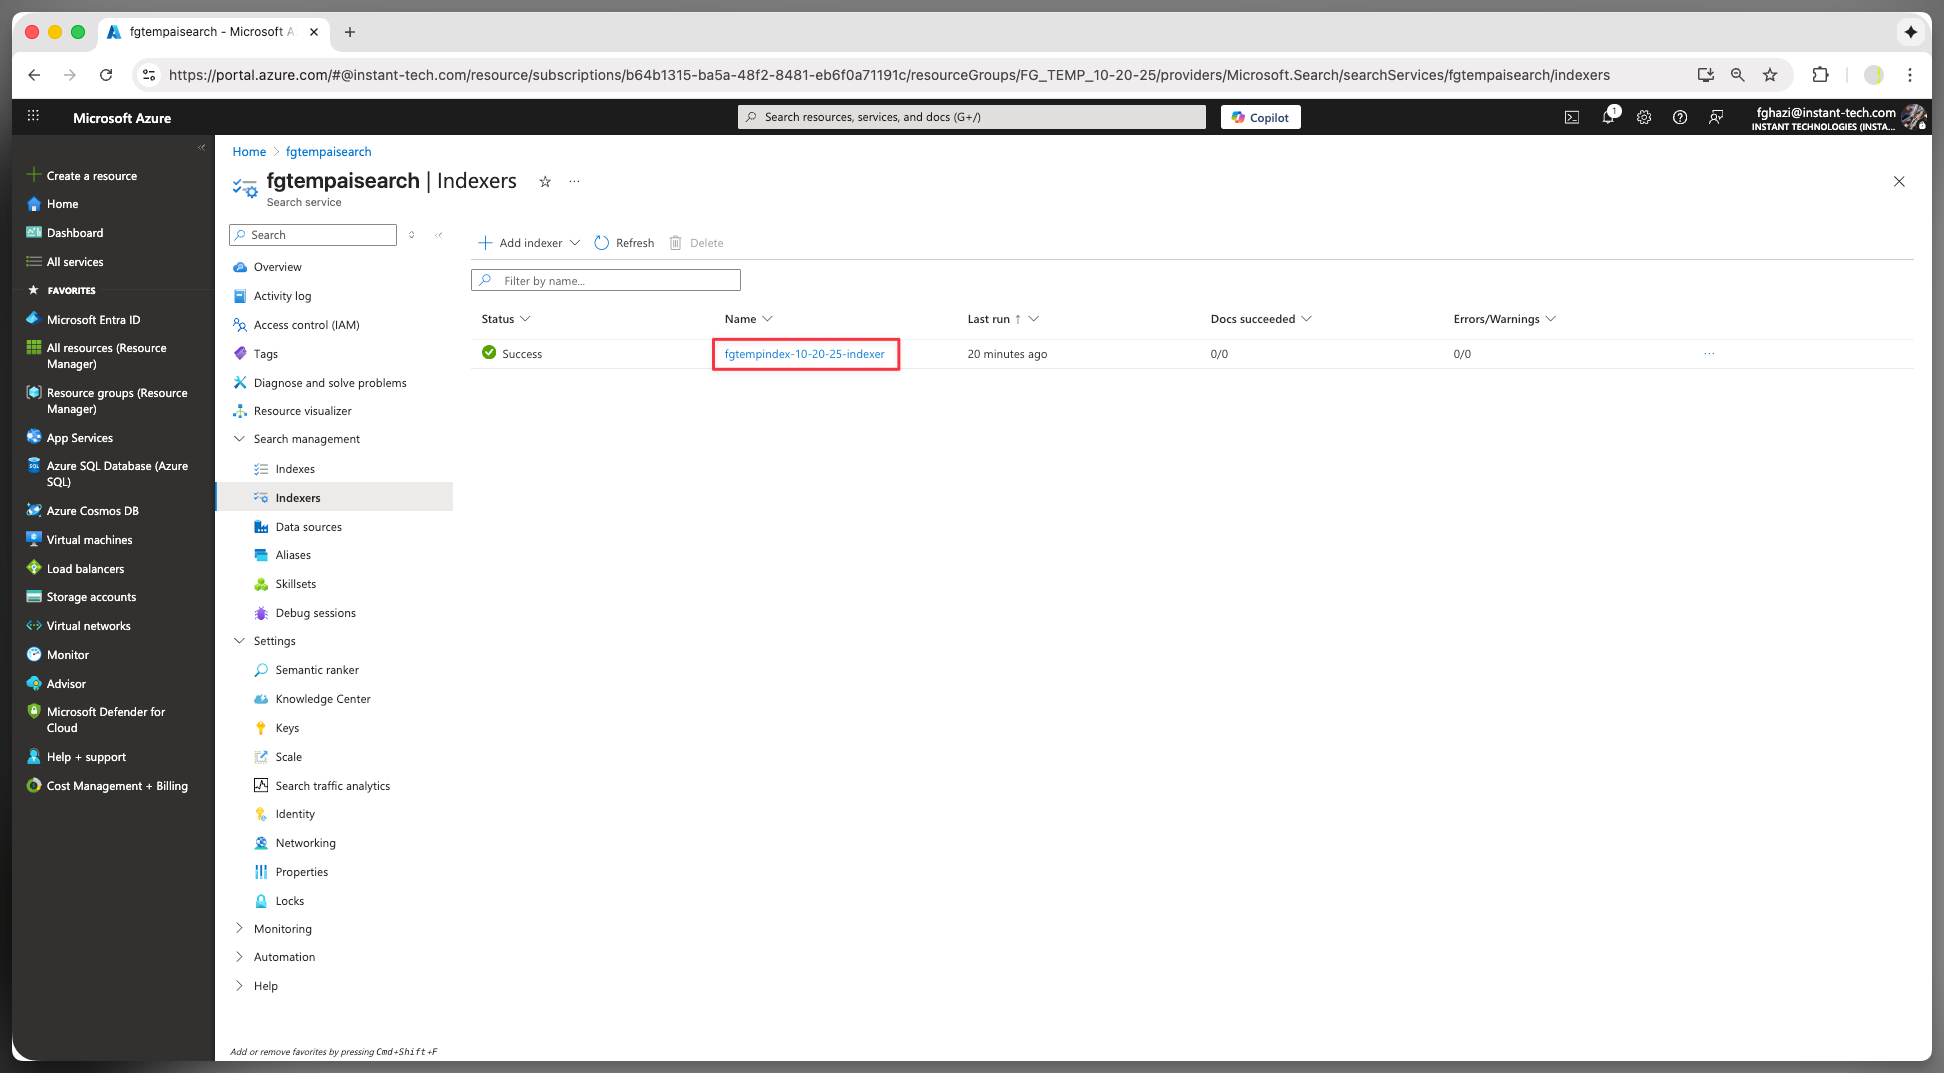
Cognitive Search Indexer Name:
Once you complete and save these settings in Chime, you will be able to create Chime knowledge base, get those knowledge base indexed, and chat using AI you deployed.
For any questions, please email support@instant-tech.com